Connect with us

Home improvement

Ductwork Inspection and Preparation for Smooth AC Installation

Published

on

Ductwork Inspection and Preparation for Smooth AC Installation

Proper ductwork inspection and preparation are crucial steps before installing a new air conditioning (AC) system. The efficiency and performance of your AC unit heavily depend on the condition of the ductwork. This guide delves into the importance of ductwork inspection and preparation and their impact on ensuring a smooth air conditioner installation process.

1. Importance of Ductwork Inspection

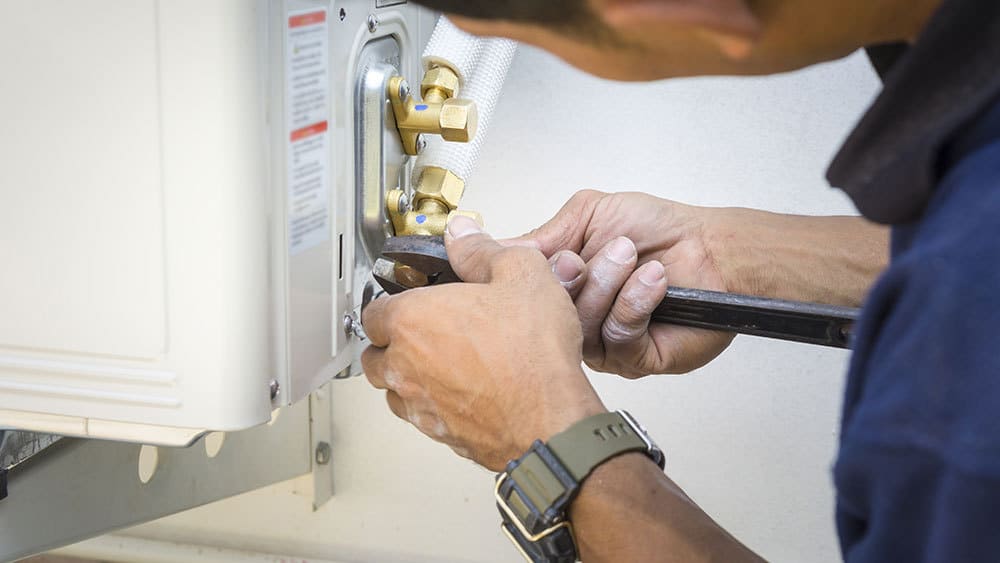
The first step in preparing for AC installation in  Big Lake, MN, is a thorough inspection of the existing ductwork. This inspection helps identify any issues such as leaks, blockages, improper sizing, or damage. Addressing these issues before installing a new AC system is essential for optimal performance and energy efficiency.

2. Assessing Ductwork Condition

During the inspection, HVAC professionals assess the condition of the ductwork, including the material, joints, seals, and insulation. They look for signs of wear and tear, corrosion, mold growth, and air leaks. Any deficiencies discovered during this assessment need to be corrected to ensure proper airflow and distribution throughout your home.

3. Ductwork Sizing and Design

Proper ductwork sizing and design are critical for efficient AC operation. HVAC technicians calculate the required duct sizes based on the cooling load of your home, ensuring that air is distributed evenly to each room. Improperly sized or poorly designed ductwork can lead to airflow restrictions, uneven cooling, and increased energy consumption.

4. Sealing and Insulating Ducts

Sealing and insulating ducts are essential steps in ductwork preparation. Sealing duct joints and connections with mastic or foil tape prevents air leaks, improving system efficiency and indoor air quality. Insulating ducts in unconditioned spaces such as attics or crawl spaces helps prevent energy loss and maintain consistent temperatures throughout your home.

5. Removing Obstructions

Obstructions such as debris, dust, or pests inside ductwork can impede airflow and compromise indoor air quality. HVAC professionals thoroughly clean and remove any obstructions during ductwork preparation to ensure optimal system performance and cleanliness.

6. Upgrading Ductwork if Necessary

In some cases, existing ductwork may be outdated or inadequate for a new AC system. HVAC technicians may recommend upgrading or replacing ductwork to meet current standards and improve system efficiency. Upgrading ductwork may involve installing new ducts, adding zoning controls, or implementing duct modifications for better airflow management.

7. Preparing for Installation Day

After completing ductwork inspection and preparation, the next step is preparing for the actual AC setup. This includes coordinating with HVAC technicians to schedule the installation date, ensuring access to the installation area, and clearing any obstacles that may hinder the installation process. Proper preparation ensures a smooth and efficient installation day.

In conclusion, ductwork inspection and preparation are critical steps in ensuring a smooth installation process and optimizing system performance. By assessing ductwork condition, sizing, sealing, insulating, and addressing any obstructions or deficiencies, HVAC professionals set the stage for a successful air conditioner installation. Properly prepared ductwork can improve homeowners’ comfort, energy efficiency, and indoor air quality. Prioritizing ductwork inspection and preparation lays the foundation for a reliable and efficient AC system for years to come.

Finding an ideal service company for AC repair is now feasible with the experts at Professional Mechanical Services. Call their experts at (612) 655-9101 to ensure optimal performance and efficiency for your new air conditioning system.

Continue Reading
Click to comment

Leave a Reply

Your email address will not be published. Required fields are marked *

Home improvement

Blind Repair: How to Fix Common Issues with Your Window Blinds

Published

on

Blind Repair: How to Fix Common Issues with Your Window Blinds

Acquiring proficiency in blind repair not only makes sense, but it also enables homeowners to effectively manage their living areas. You may prolong the useful life and visual appeal of your blinds for many years by being aware of typical problems and adhering to these repair instructions. Keep in mind that maintaining your window coverings will help them remain beautiful and functional for a longer period of time.

Common Issues with Blinds

Blinds come in various types such as vertical blinds, horizontal blinds, roller blinds, and more. Here are some common problems you might encounter:

Broken or Bent Slats: Slats can break or become bent, affecting both the functionality and appearance of the blinds.

Stuck or Jammed Mechanisms: Tilt mechanisms or lift cords can get jammed or stuck, preventing you from adjusting the blinds properly.

Faulty Cord Locks: The mechanism that locks the blinds in place when they are raised or lowered may malfunction.

Tangled or Snapped Cords: It can be challenging to raise or lower the blinds smoothly due to tangled or broken lift cords.

Instruments You May Require

assemble the equipment and supplies needed before starting any repairs:

Phillips and flathead screwdrivers

Pliers

Slats to be replaced, if necessary

Cord locks or replacement cords

Cutlery

Supplies for cleaning (optional)

A Comprehensive Guide for Fixing Blinds

1. Assessment and Preparation

Identify the Problem: Examine your blinds closely to determine what needs to be fixed. Is it a broken slat, a jammed mechanism, or a tangled cord?

Prepare Your Workspace: Remove the blinds from the window and lay them on a flat surface covered with a clean cloth to prevent scratching.

2. Repairing Broken or Bent Slats

Remove Damaged Slats: Depending on the type of blinds, you may need to unhook the damaged slats from the ladder cord. Use pliers to gently release the slats.

Replace with New Slats: Insert the new slats by threading them through the ladder cord, ensuring they are aligned properly with the existing slats.

3. Fixing Jammed Mechanisms

Inspect the Tilt Mechanism: If the slats won’t tilt, check the tilt mechanism. Often, this can be fixed by realigning or replacing the tilt rod or mechanism.

Replace Cord Locks:It could be necessary to replace the cord lock mechanism if lifting the blinds doesn’t keep them in place. As directed by the manufacturer, unscrew the previous cable lock and replace it.

4. Repairing Lift Cords

Untangle Cords: Carefully untangle any knots in the lift cords using your fingers or a pair of scissors if necessary.

Replace Snapped Cords: If a cord is snapped, cut it above the knot and thread a new cord through the blinds, tying a secure knot at the end.

5. Reinstallation and Testing

Reinstall the Blinds: Once repairs are complete, rehang the blinds carefully, ensuring all components are securely fastened.

Test Functionality: Make sure all the problems have been fixed by giving the blinds a full range of motion tests.

Tips for Maintaining Longevity

To minimise the need for repairs and increase the longevity of your blinds:

Frequently clean your blinds to avoid dust accumulation.

Use moderate force when adjusting blinds.

Replace damaged components promptly.

Keep pets away from blinds to prevent damage.

Conclusion

You may successfully fix typical problems with your window blinds and preserve their usefulness and visual appeal by adhering to these instructions. You can extend the life of your blinds and take advantage of their benefits for many years to come with a little work and the correct tools. It’s a good idea for every homeowner to learn how to handle little repairs as soon as possible because it can help you avoid having to replace your blinds completely.

Continue Reading

Home improvement

Expert Advice on Finding the Best Window Specialist for Your Repair Needs

Published

on

Expert Advice on Finding the Best Window Specialist for Your Repair Needs

When you need window repairs, finding the right specialist is crucial. Windows are vital to your home’s comfort and security. Here’s how you can find the best window specialist for your repair needs.

Start with Research

The first step is to do some research. Look up emergency window repair services in your area. Check their websites and read reviews from other customers. Websites like Yelp and Google Reviews are great places to start.

Ask for Recommendations

Word of mouth is powerful. Ask friends, family, or neighbors if they have worked with good window specialists. Personal recommendations often lead to reliable and trustworthy professionals.

Check Credentials

Ensure the specialist has the necessary credentials. They should be licensed and insured. This protects you in case of any accidents or damages during the repair process. Check out this top window repair in Vegas for some reference.

Experience Matters

Experience is key when it comes to window repairs. An experienced specialist will know how to handle various types of windows and issues. Ask how long they have been in business and what kind of repairs they specialize in.

Get Multiple Quotes

Don’t settle for the first quote you receive. Contact several specialists and ask for estimates. This will help you compare prices and services. Remember, the cheapest option is not always the best.

Ask About Warranties

Good window installation specialists should offer a warranty on their work. This shows they stand by their services and provide you with peace of mind. Make sure to ask about the terms and duration of the warranty.

Evaluate Customer Service

Pay attention to how the specialist communicates with you. Are they prompt in returning calls or emails? Do they answer your questions clearly and patiently? Good customer service is a sign of a professional and reliable business.

Inspect Previous Work

Ask if you can see examples of their previous work. Many specialists have portfolios or can provide references. Seeing their past projects can give you an idea of their craftsmanship and attention to detail.

Discuss the Timeline

Time is often a crucial factor in repair work. Discuss the timeline for the repair job upfront. Ensure the specialist can complete the work within your desired timeframe.

Review the Contract

Before starting any work, review the contract carefully. Ensure all the details are included, such as the scope of work, materials to be used, cost, and timeline. Don’t hesitate to ask for clarification before signing.

Trust Your Instincts

Finally, have faith in your instincts. Something is probably off if it feels that way. You want to collaborate with someone you can trust to perform a good job and with whom you feel at ease.

Looking for the Best Window Specialist

Finding the right window specialist doesn’t have to be daunting. By doing thorough research, asking the right questions, and trusting your instincts, you can find a reliable professional to handle your repair needs. Don’t forget to prioritize experience, credentials, and customer service. Good luck with your search!

For more expert advice and tips on home repairs, stay tuned to our blog.

Continue Reading

Home improvement

The Benefits of Choosing Affordable Landscaping Solutions for Your Home

Published

on

The Benefits of Choosing Affordable Landscaping Solutions for Your Home

Transforming your outdoor space doesn’t have to be expensive. Why not explore affordable landscaping solutions for your home? These can help you create a beautiful and functional yard.

Many homeowners think professional lawn care and landscaping are out of reach. However, affordable landscaping solutions can change that. Have you considered looking into cost-effective options?

From simple plantings to DIY projects, there are many ways to save. You don’t need to break the bank to get stunning results.

We’ll explore how affordable landscaping can make your lawn shine. Let’s dive into the world of budget-friendly landscaping ideas.

Cost Savings

One of the biggest advantages of affordable landscaping is the significant cost savings. With budget-friendly options, you can give your home a curb appeal makeover without spending a fortune.

Simple strategies like using native plants or drought-resistant species can cut down on water bills. DIY projects can reduce costs, such as:

  • building your garden beds
  • installing solar lights

Maintaining a beautiful lawn on a budget can increase your home’s value. It keeps your finances in check.

Increased Property Value

Affordable landscaping can boost your home’s value. A well-maintained yard makes a strong first impression on potential buyers. Simple touches, like fresh mulch and trimmed hedges, can make your property look cared-for and inviting.

Thoughtful landscaping layouts can also highlight your yard’s best features. It makes it more appealing.

Investing in budget-friendly landscaping can yield a big return. It ensures your property stands out in the market.

Sustainability

Affordable landscaping options also promote sustainability. Using native plants helps maintain the local ecosystem, as these species need less water and care.

Choosing drought-resistant plants further reduces water usage. It is good for the environment and your water bill. Simple adjustments, like composting garden waste, can enrich the soil without harmful chemicals.

Solar-powered garden lights can reduce energy consumption, making your yard eco-friendly and beautiful. Sustainable landscaping practices benefit your wallet and the planet.

DIY Opportunities

Diving into DIY landscaping projects can be rewarding and cost-effective. With the right landscape materials Greeley has to offer, you can transform your yard without the need for professional help.

Simple projects like creating a garden path with stones or building a raised vegetable bed from reclaimed wood are easy to handle on your own. Planting flowers, shrubs, and small trees can also be a fun family activity.

These DIY efforts save money. It also gives you personal satisfaction and a sense of accomplishment.

Lower Maintenance Costs

Opting for affordable landscaping solutions often means enjoying lower maintenance costs over time. By choosing low-maintenance plants and materials, you can cut the need for regular upkeep.

For instance, native plants are adapted to the local climate and soil. It requires less water and fertilizer. Mulching can help keep soil moisture and reduce weed growth.

Investing in total lawn care and landscaping services that focus on sustainable practices can further reduce maintenance expenses. It leaves you with a beautiful yet easy-to-manage yard.

Discover the Benefits of Choosing Affordable Landscaping Solutions

Affordable landscaping offers great benefits to homeowners. It saves money and boosts property value. Budget-friendly landscaping ideas are also sustainable choices.

DIY landscaping projects are fun and rewarding. Lower maintenance costs are a bonus. Affordable landscaping makes your home beautiful and eco-friendly.

Start exploring these solutions today. The benefits are too good to miss out on.

Did you find this article helpful? If so, check out the rest of our site for more informative content like Korina Harrison Biography: Background, Net Worth, Corey Harrison’s Divorce.

Continue Reading

Trending