Connect with us

Home improvement

Beneath the Surface: Steps to Finishing a Basement

Published

on

Beneath the Surface: Steps to Finishing a Basement

Did you know that the home remodeling market is set to hit $1.80 trillion by 2030? This shows that more homeowners are investing in home improvement projects.

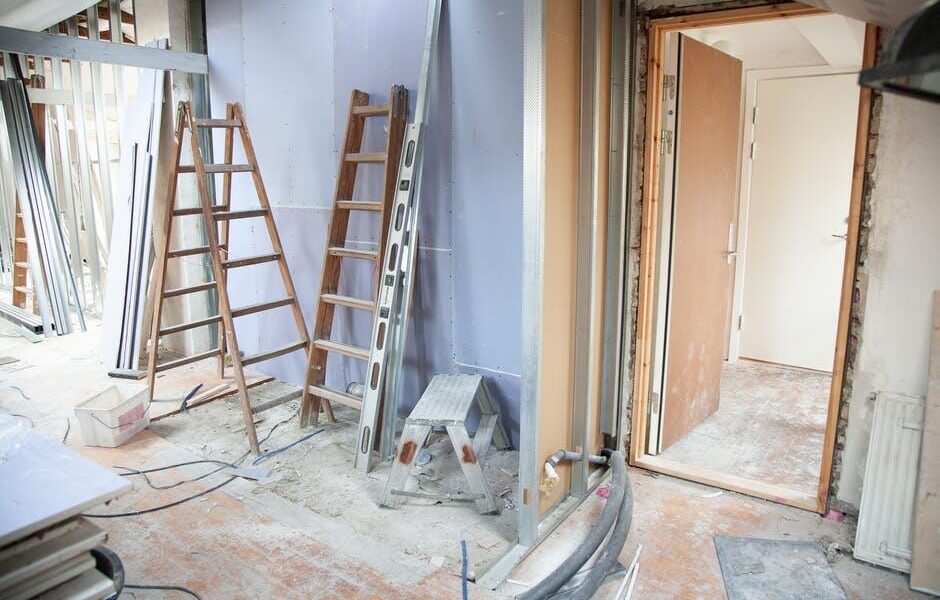
One of the most popular home improvement projects is finishing a basement. This adds value to the home and also provides extra living space. However, the process of finishing a basement can be daunting and overwhelming for many homeowners.

In this guide, we will break down the steps to finishing a basement. Read on to help you navigate through the process with ease.

Evaluate Your Space

Before diving into any home remodeling project, it’s important to evaluate your space. Determine if it’s suitable for what you have in mind. Consider factors such as the height of the ceiling, current moisture levels, and any existing structural issues.

Height of the Ceiling

The height of the ceiling is an important factor to consider when finishing a basement. According to building codes, the minimum height requirement for a finished basement is 7 feet. If your ceiling falls below this requirement, you may need to do some excavation work or lower the floor level.

Moisture Levels

Basements are notorious for being damp and prone to moisture issues. Before starting any remodeling work, it’s crucial to address any existing moisture problems. This includes leaks or mold growth.

This will ensure that your newly finished basement stays dry and safe for living. It can also save you from costly repairs in the future.

Structural Issues

It’s important to inspect for any structural issues such as cracks, bowing walls, or uneven floors. These can be red flags and may require professional help. This is to ensure the safety and stability of your home.

Plan Your Layout

Once you have evaluated your space and addressed any issues, it’s time to plan out the layout for your basement. Consider how you want to use the space. This will help you decide on the layout and design elements.

Here are some factors to consider when planning your layout:

Functionality

Think about the purpose of each area in your basement. Make sure that the layout allows for easy flow and accessibility to each space. For example, if you plan on having a home gym, make sure there is enough room for equipment and space to move around.

Lighting

Basements typically have limited natural light, so it’s important to plan for proper lighting. Consider installing recessed lighting or adding windows for more natural light. This will help make the space feel brighter and larger.

Storage Space

Don’t forget about storage when planning your layout. Utilize areas such as under stairs or built-in shelving to maximize storage options. This will help keep your basement organized and clutter-free.

Set a Budget

Finishing a basement can be a costly project, so it’s important to set a budget and stick to it. Consider all the expenses such as materials, labor costs, and any necessary permits or inspections.

It’s also a good idea to leave some room in your budget for unexpected expenses that may arise during the renovation process. This will help prevent any financial stress down the road.

Get the Necessary Permits

Before starting any construction work, make sure to check with your local government for necessary permits. Depending on the scope of your project, you may need permits for electrical, plumbing, or structural work.

It’s important to follow proper procedures to avoid any issues in the future. Failure to obtain the necessary permits can result in fines or having to redo the work.

Choose Quality Materials

Investing in quality materials is key when finishing a basement. This will ensure that your space looks good and also stands the test of time.

When choosing materials, consider factors such as durability and moisture resistance. This will help prevent any issues with mold or water damage in the future.

Some recommended materials for basement finishing include:

  • Waterproof flooring
  • Moisture-resistant drywall
  • Mold-resistant insulation
  • LED lighting fixtures
  • Quality paint
  • Proper ventilation systems

Frame and Insulate

Now it’s time to start the construction process. The first step is framing the walls and insulating them. This will provide structure and also help with temperature control and soundproofing.

Make sure to use moisture-resistant materials. Also, leave a gap between the insulation and the exterior wall to prevent any potential water damage.

Install Plumbing and Electrical

If your basement will have a bathroom or kitchen, you’ll need to install plumbing. This includes running water lines and drains for sinks, toilets, and showers.

Next, hire a licensed electrician to handle the electrical work. They will install wiring for outlets, light fixtures, and any other necessary electrical components. It’s important to hire professionals for these tasks to ensure safety and compliance with building codes.

Finish the Walls and Ceiling

With the framing, insulation, plumbing, and electrical work complete, it’s time to finish the walls and ceiling. This includes installing drywall, painting, and adding any decorative elements such as trim or molding.

When choosing paint colors, opt for light shades to make the space feel brighter. You can also add texture to your walls with wallpaper or faux finishes for a unique touch.

For the ceiling, you can choose between a traditional drywall finish or more modern options. Consider factors such as budget and aesthetics when making this decision.

Add Flooring and Finishing Touches

Finally, add the finishing touches to your basement by installing flooring and adding any necessary fixtures or furniture. For flooring, choose a waterproof option that can withstand potential moisture issues.

You can also add decorative elements such as rugs, curtains, and furniture. This will make the space feel more inviting and cozy. It can also be a great opportunity to showcase your style.

If you need help with all these, you can check https://zzonehomes.ca/. They provide quality basement renovation services and can assist you with the process from start to finish.

Steps to Finishing a Basement Effectively

Finishing a basement may seem like a daunting task. But with proper planning and execution, it can be a rewarding project. Follow the steps to finishing a basement in this guide to create a functional and beautiful space that adds value to your home.

Don’t let your basement go unused any longer. Follow these steps and turn it into a valuable and functional part of your home. Who knows, you may just end up spending more time in your newly finished basement than any other room in the house!

Browse our other blog posts for more information and tips!

Continue Reading
Click to comment

Leave a Reply

Your email address will not be published. Required fields are marked *

Home improvement

The Hidden Dangers of Brown Mold in Buildings

Published

on

The Hidden Dangers of Brown Mold in Buildings

Have you ever wondered just how dangerous brown mold could be lurking in your living spaces? This seemingly innocuous type of mold can pose significant threats to your health and property.

In our upcoming blog post, we’ll uncover the hidden dangers of brown mold, how to identify it, and the effective steps you can take to safeguard your environment. By the end, you’ll have the essential knowledge to protect yourself and your loved ones from this silent invader.

What is Brown Mold?

Brown mold, also known as Stemonitis, is a type of mold that can grow in damp areas. It’s often found in places like basements, bathrooms, or any area with high humidity. This mold isn’t an eyesore; it can damage your property and health.

Why Brown Mold is Dangerous

Brown mold is dangerous because it can cause a range of respiratory issues, especially in vulnerable individuals such as children and the elderly. Additionally, it can compromise the structural integrity of your home by weakening wood and other materials.

Health Risks

Brown mold can cause a range of health problems. You might experience allergies, headaches, or respiratory issues. If you have asthma or other lung conditions, it can make things worse. Prolonged exposure can lead to serious health concerns.

Property Damage

Brown mold can also damage your property. It feeds on organic materials, which means it can eat away at wood, paper, and even some fabrics. This can weaken the structure of your home over time, leading to costly repairs.

How to Spot Brown Mold

Brown mold can be tricky to find. It often hides behind walls, under carpets, or in crawl spaces. Here are a few signs to watch for:

Discoloration

Look for brown or rusty stains on the walls. Check ceilings as well.

Musty Smell

A strong, musty odor can be a sign. Hidden mold may be present.

Allergy Symptoms

If you notice your allergies acting up, it might be due to mold. Check your environment for any signs of mold growth.

Preventing Brown Mold

The key to preventing brown mold is to control moisture levels in your home by using dehumidifiers and ensuring proper ventilation. Regularly inspecting and repairing leaks can also help keep mold at bay and protect your living spaces.

Control Humidity

One of the most effective methods to prevent brown mold, and building mold in general, is to manage the humidity levels in your home. Use dehumidifiers, particularly in damp areas such as basements. Ensure your home is well-ventilated to cut moisture.

Clean Regularly

Keep your home clean and dry to prevent house mold. Regularly clean bathrooms and kitchens, as these areas are prone to mold growth. Use mold-killing products during cleaning to keep house mold at bay.

What to Do If You Find Brown Mold

If you find brown mold, it’s best to call in the experts. Removing mold can be tricky and dangerous if not done properly. Certified mold removal in Caldwell, NJ, can help you get rid of mold safely and effectively.

Safeguarding Your Home from Brown Mold

In conclusion, brown mold is a silent yet serious threat to both your health and your home. By understanding what brown mold is and how to identify it, you can take proactive steps to prevent its growth. Controlling humidity, fixing leaks, and regular cleaning are key preventative measures.

Should you encounter brown mold, seek professional help to ensure safe and effective removal. Prioritizing these actions will help protect your living environment from the potentially harmful effects of brown mold.

Want to learn more? Explore our other articles before you leave!

Description: Brown mold in buildings can pose serious health risks to occupants. Learn about the hidden dangers of brown mold and how to address this issue effectively.

Continue Reading

Home improvement

6 Essential Elements of a Well-Designed Roof Detail

Published

on

6 Essential Elements of a Well-Designed Roof Detail

Designing a roof involves more than picking materials. A well-designed roof detail ensures durability. How do you achieve this?

It must handle various weather conditions. Consider the importance of a good roof design. It isn’t for aesthetics.

A proper roof detail prevents leaks and damage. Are you aware of all the essential elements involved? This blog will explore those crucial factors.

From water management to thermal insulation, every aspect matters. Let’s dive into what makes your roof design good and exceptional.

1. Water Management

Proper water management is essential in all roof designs. Any damage caused by water can be expensive and time-consuming to fix. A well-designed roof detail should have a reliable drainage system to prevent standing water or leaks. This includes:

  • gutters
  • downspouts
  • proper sloping

Various types of industrial roof drainage systems, such as internal drains and scuppers, are crucial to ensure efficiency. Regular maintenance and inspections are also key to prolonging the lifespan of these systems.

2. Structural Support

A well-designed roof must have adequate structural support to handle various weather conditions. This includes wind, snow, and heavy rain loads.

The design should also consider the weight of the roofing material itself. It is important to consult with a structural engineer to ensure that the roof can withstand these elements and support its weight without compromising the safety of the building’s occupants.

3. Thermal Insulation

Insulation helps regulate temperature and plays a crucial role in preventing moisture buildup. This is especially important in areas with extreme weather conditions.

Proper insulation can reduce energy costs, prevent mold growth, and improve comfort within the building. Choose appropriate insulation materials and install them to achieve optimal results.

4. Ventilation

Proper ventilation keeps your attic and roof cool, preventing moisture buildup and mold growth. It also helps with regulating temperatures and reducing energy costs.

A good roof design should have adequate ventilation through vents, soffits, or ridge vents. Proper placement and sizing of ventilation openings are crucial to ensuring air circulation.

5. Flashing

Flashing refers to the material used to create a water-resistant barrier around openings on the roof. It includes

  • chimneys
  • skylights
  • vents

A well-designed roof detail must include flashing to prevent leaks and water damage. It is important to use high-quality materials and install them to ensure effectiveness.

6. Quality Materials

A well-designed roof detail should use high-quality materials that are durable and can withstand various weather conditions. This includes the roofing material and the underlayment, flashing, and other components used in the design. It may be tempting to cut costs by using cheaper materials, but in the long run, investing in quality materials will save you time and money on repairs and replacements.

Learn These Essential Elements of a Well-Designed Roof Detail

A well-designed roof detail is crucial for the longevity and efficiency of your roof construction. Each element, from water management to the choice of quality materials, plays a significant role in ensuring your roof can withstand various weather conditions and provide lasting protection.

By paying attention to these essential elements, you can achieve a roof design that looks great and offers reliable and durable performance. Investing time and resources in proper roof detail will save you from costly repairs and replacements.

Did you find this article helpful? If so, check out the rest of our site for more informative content.

Continue Reading

Home improvement

DIY vs Professional Lock Repairs: What’s the Best Option?

Published

on

DIY vs Professional Lock Repairs: What's the Best Option?

When it comes to lock repairs, you’ve got two options: do it yourself or call a pro. Each choice has its own perks and pitfalls. DIY might save you some bucks, but it can be tricky.

Hiring a professional can be more costly, but it’s usually quicker and safer. So, which one is best for you? Let’s explore both sides to help you decide.

DIY Lock Repairs

Doing it yourself can be tempting, especially if you enjoy hands-on projects. Here are some key points to consider:

Cost Savings

Repairing a lock yourself can save you money. You do not need to pay for professional labor. You only spend on the parts needed for the repair. This can be cheaper than hiring a locksmith.

DIY auto lock repair can be particularly cost-effective if you already have some tools. However, it is important to know your limits to avoid further damage.

Learning Experience

Repairing a lock yourself can be a valuable learning experience. You can gain new skills and knowledge that might be useful in the future. Understanding how locks work can give you more confidence in dealing with similar issues.

Plus, completing a repair on your own can provide a sense of accomplishment and satisfaction. By learning through hands-on practice, you can also improve your problem-solving abilities.

Professional Lock Repairs

On the other hand, hiring a professional locksmith has its advantages:

Expertise

Professional locksmiths bring a high level of expertise to every job. They have years of training and experience dealing with all types of locks. This ensures that they can quickly and efficiently diagnose and fix any issues.

Additionally, they use specialized tools that most people do not have access to. This reduces the likelihood of causing further damage to the lock.

For more complex needs, such as car key replacement, a professional’s skills are invaluable. They can provide reliable and hassle-free service, saving you time and stress.

Time-Efficient

Hiring a professional locksmith is time-efficient. They can quickly diagnose and repair the problem without guesswork. This is important if you are in a hurry or if the lock is critical for your safety. Professional locksmiths can complete the job faster than most DIY attempts.

They have the right tools and experience to get it done efficiently. This saves you time and effort. Plus, using a lock replacement service means you get guaranteed results with minimal fuss. You won’t have to worry about spending hours trying to fix the lock yourself.

Safety

When it comes to safety, professional locksmiths have a clear advantage. They know how to repair and install locks correctly, ensuring that your property is secure. Attempting a DIY lock repair can sometimes result in mistakes, which may leave your home or car vulnerable to break-ins.

Professionals use high-quality parts and the latest techniques to enhance security. This provides peace of mind, knowing that the job is done right. Additionally, a locksmith can offer advice on the best types of locks for your specific needs, further enhancing your overall safety.

Learn All About Lock Repairs

In conclusion, whether to DIY or hire a pro for lock repairs depends on your skills and situation. DIY can save money and teach you new things, but might lead to mistakes. Hiring a locksmith is quick, safe, and reliable, though it costs more. So, choose wisely based on your needs!

Did you find this article helpful? Check out the rest of our blog.

Continue Reading

Trending